

(I am away for my wedding and Honeymoon so I am re-posting some of my favorites)
When I started to dabble in some modeling in college, I noticed that a lot of the makeup artists had palettes of MAC eye shadow. They seriously looked awesome. I wished I could put all of the single shadows that I had into one of their palettes, but I was told you have to buy them that way.
I found out you can buy the eye shadows as refills which
don’t have the outside plastic casing and then buy an empty palette that holds
15 refills to put them all in. Each refill has a magnet at the bottom as does
the case, so that’s how they stick in there.
The problem was, by that time, I had over 45 single shadows
in their big ole plastic cases!
Then one day, I met the greatest makeup artist ever. She told me she had started with a bunch of
singles too and had figured out a way to get them all into palettes. Que the
Hallelujahs! I was so excited.
She taught me how to do it and after perfecting it….I
thought I would teach you all how to go from this:


 |
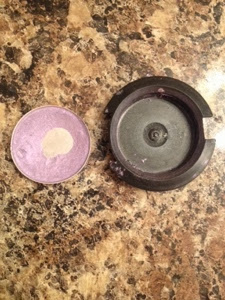
Step 1: Slide a safety pin in the tiny crack along the front of the top part of the shadow case (once its open). Sometimes it takes a little work, but you should be able to jimmy it in there.

Step 2: Once you get the safety pin in, you should be able to pop the two pieces apart and separate them.


Step 3:
Take a lighter and hold it under the bottom of the
shadow plate to warm it up. I do think for a good 15-25 seconds. It
slightly singes the bottom of the plastic, but you don't need to worry
about that. What you are really doing here is loosening the glue that is
keeping the two pieces together.

Step 4:
Once it is good and warm, take a safety pin and gently slide it along
the outside of the metal part to loosen it. Gently try to stick the pin
under the metal piece and pry it up. Be careful with this, is you are
too harsh, the shadow will crack and you will have a mess!


Step 5: Pop out the metal piece with shadow in tact!
Step 6: Cut a piece of magnet tape the size of the metal
piece and stick it on the bottom.


Step 7: Place into palette!

Voila! Now you have your very own MAC palette :)

I took the time to label the lids of my palettes so I would know what the names of the shadows were in case I wanted to purchase refills (which clearly I need to do). Now, obviously, when I go into MAC I don’t purchase the single plastic containers, I purchase the refills. They are actually $5 cheaper. Can you imagine how much I could have saved had I known this a long time ago?!?
Hope I at least help a few of you out!

 Newer Post
 Older Post
 Home
Home
No comments:
Post a Comment